
How to repair leaking shower handles
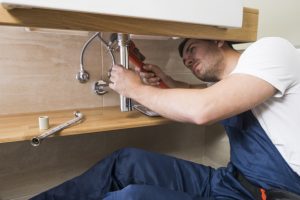 When it comes time to repair a leaky shower handle, you will most likely find that you have one of the three common types of shower handle assemblies. The assembly’s components are valve stems, ball valves and cartridges. Fortunately, they are easily accessible for quick repairs and replacements. The most common reason for a leak is seal failure due to age, friction or defect. You will need to replace the entire cartridge and valve stem, as well as a few rubber seals and gaskets on the ball valve. To avoid a mess, turn off the water in the shower or bathtub before making repairs.
Valve stem
Using a flathead screwdriver, remove the center cap of the shower handle, if present. The handle is secured to the valve stem by the screw inside. Remove the screw with a Phillips screwdriver. Pull the handle straight out to release it from the valve stem.
Grasp the escutcheon and turn it counterclockwise to loosen and remove it. Some escutcheons are easy to pull off without loosening any threads, or they have a set screw on the bottom, depending on the manufacturer of the shower fixtures. Use either a small flathead screwdriver or a hex wrench to remove a set screw.
Grasp the valve stem with your hand or pliers and pull straight out to remove it from the shower valve body in the wall.
Wrap plumber’s tape counterclockwise two or three times around the threads of the new stem valve. Insert the new stem valve into the shower valve body and turn clockwise by hand to tighten. Slide the valve wrench over the head of the valve stem and tighten the valve with a half to full turn.
Slowly turn the water supply back on. Then make sure there are no leaks. Turn the stem with pliers to make sure everything is working properly. Reassemble the rosette and handle to complete the repair.
One-handle cartridge
Remove the shower handle by either unscrewing the set screw on the bottom with a small flathead screwdriver or hex wrench, or by removing the center cap.
Grasp the sleeve surrounding the cartridge with your hand or pliers and pull it off to expose the cartridge body. Then try to locate the top tab of the pin that secures the cartridge. Grasp the tab with pliers and pull upward to remove it from the cartridge body.
Call the Emergency Plumber in Durham. Every plumbing issue is solved by licenced and professional plumbers. Furthermore, we are 24 hours available. Call us now! 01913039678.
We also collaborate with: Emergency Plumber in Bath, Emergency Plumber in Nottingham, Emergency Plumber in Preston, Emergency Plumber in Basingstoke and Drain Unblocking Services.